


Bartels Family Sukkot Celebration
Pictures
2003/5764
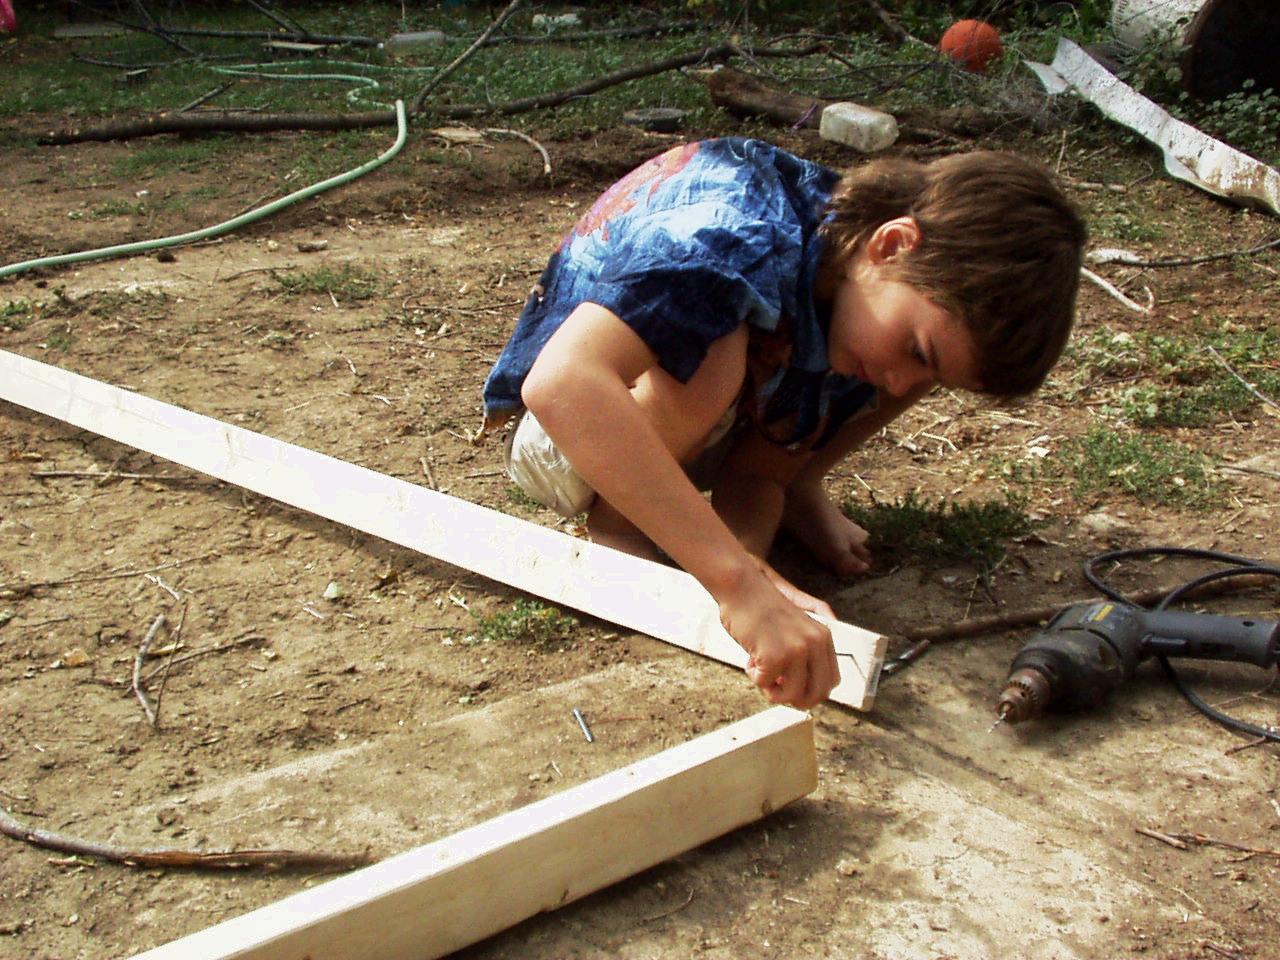
This was our third year celebrating the Feast of Tabernacles. Our sukkot for the first two years strongly resembled the typical child's tent made of bedspreads, sheets, and rope. This year we wanted to get "fancier" and actually use lumber! Of course, that drove up the cost quite a bit, but we believe we have something that can be easily taken down and rebuilt the following year. We used lattice, 2x3's, 1x2's, 2x2's, wood and machine screws, washers, nuts, cup hooks, and screw eyes. The side lattices were screwed onto their supports, but the rest is bolted, allowing for quick construction and break down, as well as minimal space for storage. Though it took longer than a week to construct working on it a little at a time, it took less than a day to completely unassemble and put away.
While our previous sukkot were about 4.5 feet wide, 5.5 feet long, and 4.5 feet high, this year's sukkah was a little greater than 6 feet wide, 8 feet long, and 6 feet high.
This moved with us to central Ohio and served us well for almost 15 years. It has been replaced by a 10' X 10' gazebo.
|
|
| Kyle helps screw a 1x3 (part of the top) to a 2x3 leg. | I attach the lattice to the first wall supports. |
|
|
| This project involved the entire family. Here the two sides have been built and a few rafters intstalled. Kyle and Stephen test fit a cross support. It did not work because the younger boys had chosen some very twisted lumber, so the rafters, beams, and such did not line up properly. | Despite defective lumber we were able to attach one of the two planned cross supports. Marty suggested and helped install the X-support which greatly increased the sukkah's stability. Here the rafters are attached at one foot intervals to form the roof. |
|
|
| Though not "kosher" we decided to install a plastic sheet on the roof to provide a modicum of protection against rain (which never happened, of course). Cup hooks were installed along the rafter supports and legs to allow the inside "walls" (bedspreads and drapes) to be attached and secured easily with safety pins. Before the project was completed, nearly 70 hooks and several screw eyes were used. | The sukkah is nearly finished. A tarp served as the base floor; a sleeping bag served as the rug. The inside walls were pinned in two places to the bottom of the lattices to help with wind. A piece of twine was run along the bottom cross support location and the inside back wall was pinned to it as well as one of the X-members to help with wind. Most of the roof branches were juniper and were lashed down. Lastly, the front of the sukkah was guyed to provide much needed stability there. |
|
|
| Here is the front door complete with a "Welcome" sign greeting all who enter. | Here was the altar area for our celebration. Though not really seen, above the candles was a 2.5 foot Star of David made of sticks. To the left of the altar was a palm plant, in front was a tape recorder to play praise music and a fruit basket, and to the right was a pitcher of water. |
|
|
| A string of fruit and a "thank chain" adorned the ceiling. Each member of the family wrote items for which he was thankful on strips of construction paper to make the "thank chain." The very top of the Mogen David may be seen in the bottom-middle of the picture. Illustrated scripture posters were hung on the walls. | One of the fun aspects about Sukkot is doing schoolwork in the sukkah, even if the temperature is a little cool. Here Kyle works on his Bible assignment, and Ryan works on his English assignment. |
Back to Bartels Family Sukkot Celebration
Page last modified September 30, 2023.
Comments, corrections, or suggestions may be directed to the page author, Mary-Frances Bartels